Contents
Did you know that homes lose their heat through poorly insulated areas? If you’re looking to improve your home’s energy efficiency and comfort, exploring DIY blow-in insulation techniques might be just what you need. From assessing your insulation needs to ensuring proper coverage, there are several crucial steps involved. By understanding these methods, you could significantly reduce energy costs and enhance your living space’s overall climate. So, what are the best practices to ensure a successful insulation project?
Key Takeaways
- Clear the workspace and organize materials to ensure safety and efficiency during the blow-in insulation process.
- Divide the area into sections to manage applications and track progress effectively.
- Use a blow-in insulation machine for even distribution, maintaining consistent nozzle distance throughout.
- Regularly check for gaps and ensure proper coverage to prevent heat loss and inefficiencies.
- Seal air leaks with weather stripping, caulk, and insulating foam to enhance overall insulation effectiveness.
Assessing Your Insulation Needs
Assessing your insulation needs starts with understanding the areas of your home that require attention.
Begin with a thorough insulation evaluation to identify spots where heat may escape or enter. Check your attic, walls, and floors, as these are critical zones for energy efficiency. Look for gaps, cracks, or inadequate coverage, which can lead to increased energy bills and discomfort.
Next, consider the age of your insulation. If it’s older than 15 years, it may not be performing as effectively as it should. You might also want to evaluate your home’s overall energy performance. Simple tests, like checking for drafts around windows and doors, can reveal where insulation improvements are necessary.
Keep an eye on your utility bills, too. A sudden spike might indicate that your insulation isn’t doing its job, prompting you to take action.
It’s essential to recognize that proper insulation regulates temperature and contributes to a cozier living environment, making your home feel more inviting.
Once you’ve pinpointed areas needing attention, you can prioritize your insulation projects. Whether you’re a DIY enthusiast or seeking professional help, understanding your specific needs ensures you’ll make informed decisions that enhance your home’s energy efficiency.
Choosing the Right Materials
When it comes to choosing the right materials for blow-in insulation, you’ve got several options at your disposal.
Understanding the various insulation materials and their R-values is crucial for maximizing your home’s energy efficiency.
Let’s explore these choices so you can make an informed decision that fits your needs.
Insulation Material Options
Choosing the right insulation material is crucial for maximizing energy efficiency and comfort in your home. You’ve got several options to consider, each with its unique benefits.
Fiberglass batts are a popular choice due to their affordability and ease of installation. If you’re environmentally conscious, cellulose fibers made from recycled paper are eco-friendly and provide excellent thermal performance.
Mineral wool is another great option; it’s fire-resistant and offers soundproofing materials for enhanced privacy in your home.
If you’re looking to improve energy efficiency, don’t overlook reflective barriers, especially in attics. They reflect radiant heat, keeping your home cooler in the summer.
R-Values Explained
Understanding R-values is essential for making informed decisions about insulation materials. R-values measure insulation effectiveness, indicating how well a material resists heat flow. The higher the R-value, the better the insulation’s performance.
When you’re choosing materials, it’s crucial to consider r-value comparisons among different options. This will help you select the best insulation for your home’s specific needs.
Keep in mind, though, that other factors like installation methods and air leakage can also affect overall performance. It’s not just about the R-value; it’s about how well the material functions in your space.
Preparing Your Space
Before diving into your insulation project, it’s crucial to prepare your space effectively. A well-organized area streamlines the process and creates a safer environment for you and your materials. Start by clearing out any clutter in the room where you’ll be working. This means moving furniture, boxes, or anything else that could get in your way. A tidy space allows you to focus on the task at hand without distractions.
Next, think about space organization. Lay out all the materials you’ll need, like your insulation bags, protective gear, and any other supplies. Keeping everything within arm’s reach saves you time and prevents unnecessary trips back and forth.
Now, let’s talk about tool preparation. Gather all the tools required for the job—like a blow-in insulation machine, a ladder, and a measuring tape. Make sure each tool is in working order; you don’t want to run into issues halfway through your project. Check your machine’s hoses and nozzles for any blockages, and ensure your protective gear, including gloves and goggles, is ready to go.
Taking these steps helps you create an efficient workspace that fosters a sense of accomplishment. You’ll feel more confident when the time comes to start your blow-in insulation project, knowing you’ve set yourself up for success!
Using a Blow-In Insulation Machine
With your workspace organized and tools in place, you’re ready to use the blow-in insulation machine. This powerful tool is vital for achieving effective insulation in your home, and mastering it will help you implement those blow-in techniques with confidence.
Before diving in, take a moment to familiarize yourself with the machine’s components and operation.
Here’s a quick checklist to ensure you’re on the right track:
- Read the Manual: Understand the specific features and instructions for your insulation machine.
- Prepare the Insulation Material: Make sure you have the right type of insulation material ready for blowing.
- Set Up the Hose and Nozzle: Attach the hose securely to the machine and choose the right nozzle for your application.
- Wear Safety Gear: Protect yourself with goggles, gloves, and a mask to keep insulation particles at bay.
Once you’re set, plug in the machine and turn it on.
Begin by feeding the insulation material into the machine while monitoring the flow rate. Move the nozzle strategically to cover the desired area evenly, adjusting your speed as needed.
Remember, you’re aiming for a consistent layer of insulation, so take your time.
Using a blow-in insulation machine may seem daunting at first, but with practice, you’ll become proficient.
Soon, you’ll be creating a cozy, energy-efficient environment in your home that everyone can enjoy. Happy insulating!
Ensuring Proper Coverage
To ensure your blow-in insulation is effective, start by assessing the areas that need coverage.
It’s crucial to achieve an even distribution, so keep an eye on the thickness as you work.
Regularly check your progress to make sure you’re not missing any spots or overfilling any sections.
Assessing Insulation Areas
When assessing insulation areas for your DIY blow-in project, it’s crucial to ensure you cover every nook and cranny effectively. This step is vital for maximizing insulation effectiveness and minimizing thermal bridging, which can lead to energy loss and discomfort in your home.
Here’s how you can get started:
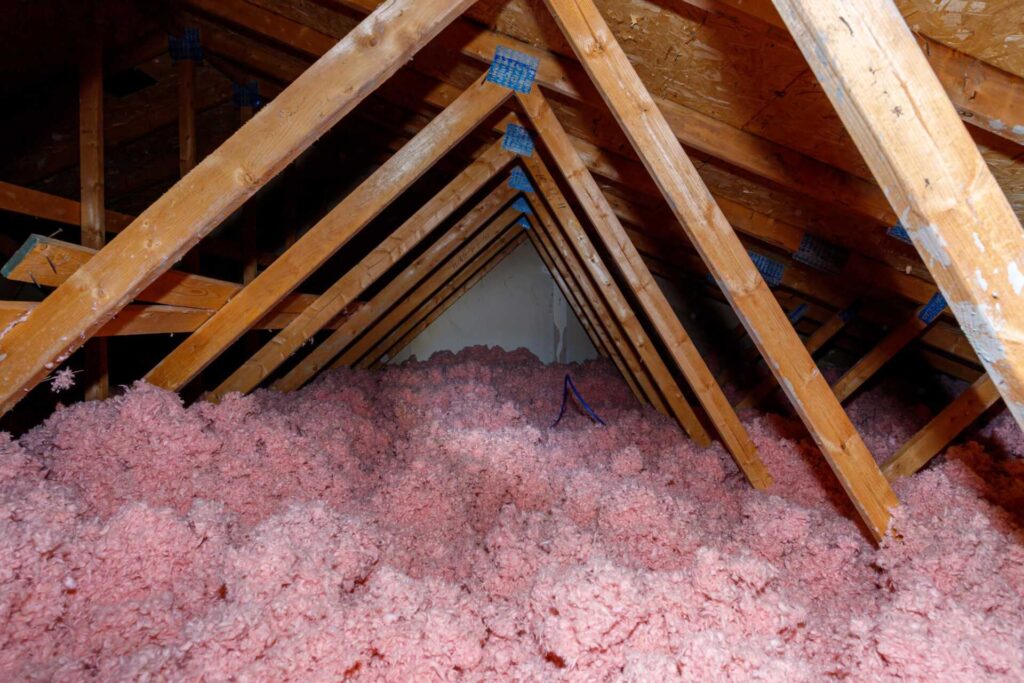
Inspect Attics and Crawl Spaces: These areas are often overlooked but can be significant sources of heat loss.
Check Around Ductwork and Pipes: Gaps around ductwork and plumbing can cause thermal bridging, reducing your insulation’s efficiency.
Look for Air Leaks: Use a flashlight to spot any cracks or openings that need attention before you blow in insulation.
Assess Existing Insulation: If you have old insulation, check its condition and thickness to determine how much more you’ll need.
Achieving Even Distribution
After assessing the insulation areas in your home, the next step is ensuring the blow-in insulation is evenly distributed for maximum effectiveness. Achieving this requires you to use specific insulation techniques that promote consistent coverage.
Start by dividing the area into sections to better manage your distribution patterns. This method helps you track where you’ve already applied insulation, preventing gaps that can lead to inefficiency.
As you begin blowing in the insulation, maintain a steady pace and keep the nozzle at a consistent distance from the surface. This will allow the material to spread uniformly.
Move in a systematic manner, either left to right or top to bottom, to ensure even coverage. If you notice any areas that seem under-insulated, take a moment to revisit them.
Don’t forget to check your progress periodically. A friend or family member can help by observing and providing feedback on the distribution patterns.
Once you’ve completed the job, take pride in your hard work. You’ve enhanced your home’s comfort and created a welcoming space for you and your loved ones.
Sealing Air Leaks
Before you dive into blow-in insulation, it’s crucial to tackle any air leaks that might undermine your efforts. Air leaks can significantly reduce the effectiveness of your insulation, leading to wasted energy and higher utility bills.
By focusing on air sealing and addressing these leaks first, you’ll create a more comfortable home environment.
Start by inspecting your home for common leak sources. You can often find them around windows, doors, and electrical outlets.
Once you identify these leaks, here are some effective strategies you can use:
Weather Stripping: Apply weather stripping around doors and windows to create a tight seal. This simple addition can help keep drafts at bay.
Caulking: Use caulk to fill gaps and cracks in your exterior walls, especially around windows and doors. Choose a paintable caulk for a neat finish if desired.
Insulating Foam: For larger gaps, like those around plumbing or electrical penetrations, expanding foam can provide a strong seal.
Door Sweeps: Install door sweeps on the bottom of exterior doors to block drafts from slipping underneath.
Maintaining Your Insulation
Maintaining your insulation is essential for ensuring it continues to perform effectively over time. By keeping up with regular maintenance, you can extend the insulation lifespan and improve your home’s energy efficiency.
Start by scheduling routine checks every year, ideally during the fall, before winter sets in. Look for signs of wear, settling, or moisture, which can compromise insulation quality.
During these checks, pay close attention to areas like attics, basements, and crawl spaces. If you notice any gaps, sagging, or mold growth, it’s time to take action.
For blown-in insulation, it’s vital to ensure it’s evenly distributed. Use a rake or broom to fluff up settled areas, making sure there are no cold spots where heat can escape.
Another important aspect is to check for pests. Rodents and insects can damage insulation, so consider installing barriers or traps if needed. If you find significant damage, you might need to replace or add more insulation to maintain optimal performance.
Finally, keep an eye on your energy bills. A sudden increase could indicate insulation issues. If you consistently notice high heating or cooling costs, it’s time to re-evaluate your insulation.
Wrap-Up
By following these DIY blow-in insulation techniques, you can significantly improve your home’s energy efficiency. Did you know that a home’s heating and cooling energy can be lost through uninsulated areas? By properly assessing your needs and sealing air leaks, you can combat this loss effectively. Take pride in your insulation project, and enjoy a cozier, more energy-efficient home. You’ll save on energy bills and contribute to a greener planet.
Recent Posts
Top 10 Attic Air Sealing Techniques for Insulation
Just as a tightly sealed ship avoids leaks and remains buoyant, your attic’s air sealing
What Are the Best Attic Air Sealing Techniques?
When it comes to attic air sealing, understanding the common leakage points is vital for
What Are the Best Energy-Efficient Insulation Upgrades?
Insulation upgrades play a crucial role in enhancing your home’s energy efficiency. You might be surprised