Contents
Did you know that proper attic insulation can greatly decrease your energy bills and improve the overall comfort of your home? By following a systematic approach to installing insulation in your attic space, you can create a more energy-efficient environment while saving money in the long run. From understanding insulation levels to implementing effective ventilation strategies, this DIY guide equips you with the knowledge and steps needed to tackle attic insulation installation with confidence. By taking the time to insulate your attic correctly, you can enjoy a more comfortable living space and potentially lower utility costs.
Key Takeaways
- Calculate existing insulation levels for proper R-value determination.
- Choose cost-effective insulation type like fiberglass or cellulose.
- Seal air leaks with appropriate sealants for energy efficiency.
- Ensure safe attic access and ventilation for moisture control.
- Regularly inspect and maintain insulation for long-term effectiveness.
Materials Needed
When it comes to attic insulation installation, having the right materials is fundamental for a successful project. Insulation thickness and cost are vital factors to take into account when selecting materials for your attic. The thickness of the insulation will impact its effectiveness in regulating your home’s temperature and energy efficiency.
Additionally, comparing the cost of different insulation materials can help you stay within budget while still achieving ideal results.
Calculating the R-value of the insulation is also significant. The R-value indicates the material’s thermal resistance, which is crucial for determining its effectiveness in insulating your attic. There are various methods to calculate the R-value, including using online calculators or consulting with insulation experts to make sure you choose the right material for your specific needs.
When selecting materials for attic insulation installation, keep in mind that the objective is to create a comfortable and energy-efficient environment in your home. By choosing the appropriate insulation thickness, considering costs, and calculating the R-value accurately, you can ensure that your attic insulation project is successful.
These materials will not only provide the necessary insulation but also contribute to your home’s overall comfort and energy savings.
Preparing the Attic
Before starting the attic insulation installation, begin by clearing the attic space of any stored items or debris to create a clean and accessible work area.
Next, check for any leaks or damage in the roof, walls, or windows that could compromise the effectiveness of the insulation.
Clearing Attic Space
To efficiently prepare your attic for insulation installation, the initial step involves clearing out the space to create a clean and accessible work area. Here are four essential steps to clear your attic space effectively:
Decluttering space: Begin by removing unnecessary items from the attic. Sort through belongings, keep what’s essential, and consider donating or disposing of items you no longer require.
Organizing items: Categorize and store items you intend to keep in labeled bins or containers. This will help maximize space and keep the attic organized for future access.
Removing debris: Clear any accumulated debris like dust, dirt, or old insulation. Use a vacuum or broom to clean the entire area thoroughly, ensuring a fresh start for the insulation process.
Cleaning area: Wipe down surfaces and walls to remove any dirt or grime. A clean attic space won’t just make insulation installation easier but also contribute to better air quality in your home.
Checking for Leaks
Before proceeding with attic insulation installation, ensuring the attic is free from leaks is necessary to prevent energy loss and maintain a well-insulated home. Detecting and repairing leaks is vital for maximizing insulation effectiveness. Start by carefully inspecting the attic for any signs of leaks, such as water stains, mold, or musty odors. Common areas where leaks occur include around chimneys, vents, and plumbing stacks. Use a flashlight to check for daylight coming through cracks or holes. Once leaks are identified, seal them using appropriate materials like caulk or foam insulation. Here is a helpful table to guide you through the process:
| Leak Detection Tips | Leak Repair Methods |
|---|---|
| Check for water stains | Seal around chimneys |
| Look for mold growth | Patch around vents |
| Sniff out musty odors | Insulate plumbing stacks |
Ensuring Proper Ventilation
Inspecting and addressing leaks is a foundational step before proceeding with attic insulation installation. Proper ventilation is essential to ensure your attic remains dry and free of moisture-related issues. Here are some key considerations for ensuring adequate ventilation before installing insulation:
Ventilation Importance: Evaluate your attic’s current ventilation system to ensure it meets the recommended standards. Proper ventilation helps control moisture levels, preventing mold and mildew growth.
Moisture Control: Install vents such as ridge vents, soffit vents, or gable vents to promote airflow and reduce moisture buildup in the attic.
Insulation Placement: Ensure that insulation doesn’t block existing vents or soffits, as this can hinder proper airflow.
Airflow Considerations: Plan the placement of insulation carefully to allow for continuous airflow from the eaves to the ridge of the attic, preventing condensation and maintaining a healthy environment.
Measuring Insulation Requirements
When determining the insulation requirements for your attic, it’s important to start by measuring the existing insulation levels accurately. This involves calculating the proper R-value for your region to determine the ideal thickness of insulation needed. The R-value represents the insulation’s resistance to heat flow, with higher R values indicating better insulation. Ensuring coverage uniformity is essential to prevent heat loss and maintain energy efficiency within your home.
To measure the current insulation levels in your attic, begin by locating an area where the insulation is easily accessible. Use a ruler or tape measure to determine the depth of the insulation. Take measurements at several points to account for any variations in thickness. This will give you an average depth to work with when calculating the R-value.
Next, research the recommended R-value for your area based on local climate conditions. This information is usually available from government resources or insulation manufacturers. By comparing the existing insulation depth to the recommended R-value, you can assess whether additional insulation is needed to meet the desired level of thermal resistance.
Choosing the Right Insulation Type
When choosing the appropriate insulation type for your attic, consider the different insulation material options at your disposal.
It’s crucial to evaluate the initial cost against the long-term advantages to discover a cost-effective solution that suits your budget.
Also, keep in mind that the correct insulation can greatly enhance energy efficiency, resulting in potential savings on heating and cooling expenses.
Insulation Material Options
Considering the diverse range of insulation material options available on the market, selecting the right type for your attic insulation installation is an important decision that can greatly impact your home’s energy efficiency and comfort levels.
Fiberglass Insulation: Known for its affordability and ease of installation, fiberglass insulation offers a good R-value comparison and can be installed using basic techniques.
Cellulose Insulation: An eco-friendly option made from recycled paper, cellulose insulation provides excellent moisture resistance and is effective in reducing energy costs.
Mineral Wool Insulation: This option is fire-resistant, eco-friendly, and provides good moisture resistance, making it a suitable choice for attic insulation in various climates.
Cost-Effective Solutions
For those seeking to achieve the best energy efficiency and savings, selecting the appropriate insulation type is fundamental. When considering cost-effective options for attic insulation, it’s essential to balance the initial investment with long-term energy savings. Here are some choices to assist you in making an informed decision:
| Insulation Type | R-Value | Cost per Sq. Ft. |
|---|---|---|
| Fiberglass | R-3.0 | $0.40 – $0.80 |
| Cellulose | R-3.5 | $0.50 – $1.00 |
| Radiant Barrier | R-1.0 | $0.15 – $0.25 |
| Mineral Wool | R-3.7 | $0.60 – $1.20 |
When selecting insulation, consider the R-value, which indicates thermal resistance. DIY techniques like appropriate installation can help maximize energy savings. Fiberglass and cellulose are popular, affordable options. Radiant barriers can be effective in hot climates, and mineral wool provides good thermal insulation. Choosing the suitable insulation type customized to your needs can result in significant energy savings over time.
Energy Efficiency Benefits
Selecting the right insulation type plays a crucial role in boosting your attic’s energy efficiency. Choosing the appropriate insulation can have a profound impact on heat retention and energy savings. Here are some key factors to take into account when determining the best insulation type for your attic:
R-Value: The R-value indicates an insulation material’s thermal resistance. Opt for insulation with a higher R-value to enhance heat retention in your attic.
Material Compatibility: Consider the materials used in your attic when choosing insulation. Make sure the materials are compatible to avoid any issues with moisture or ventilation.
Insulation Form: Choose between batts, rolls, or loose-fill insulation based on your attic’s layout and accessibility. Each form provides different advantages for energy efficiency.
Environmental Impact: Select insulation materials that are environmentally friendly and eco-conscious to positively impact the environment while enhancing energy efficiency in your home.
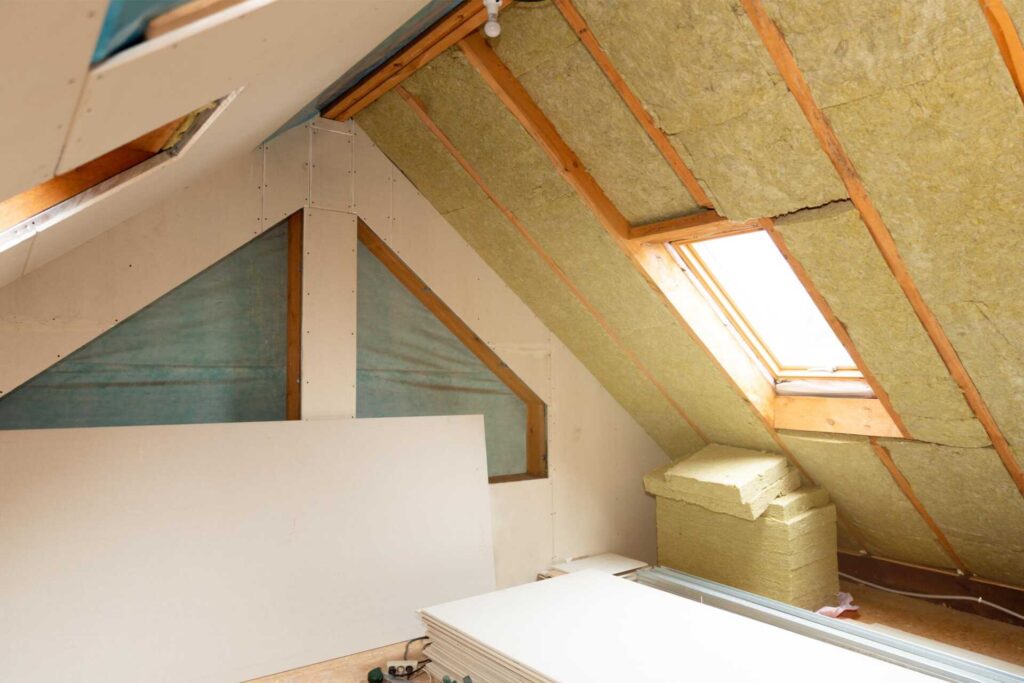
Installing Insulation Batts
Ready to handle the task of installing insulation batts in your attic? When it comes to improving the energy efficiency of your home, proper installation of insulation batts is essential. Insulation batts are pre-cut panels of fiberglass or mineral wool that are designed to fit between wall studs, ceiling joists, and floor joists.
Before delving into the insulation installation process, it’s crucial to grasp the insulation R value and make sure that your attic is adequately air-sealed.
The insulation R-value gauges the thermal resistance of the insulation material. The higher the R-value, the better the insulation’s capacity to resist heat transfer. When choosing insulation batts for your attic, consider the recommended R-value for your area to achieve optimal energy savings.
Moreover, attic air sealing is a vital step before installing insulation batts. Sealing air leaks in your attic prevents warm air from escaping in the winter and entering in the summer, aiding in maintaining a consistent indoor temperature and reducing energy costs. Common areas to inspect for air leaks include around pipes, ducts, chimneys, and electrical wiring.
Sealing Air Leaks
When it comes to sealing air leaks in your attic, the first step is to identify common problem areas such as gaps around pipes, ducts, and electrical wiring.
Choosing the appropriate sealants customized to the specific materials in your attic is essential for long-lasting effectiveness.
Applying sealing techniques like caulking, weatherstripping, and using foam insulation can help create a more airtight space, ultimately enhancing energy efficiency and decreasing heating and cooling costs.
Identifying Common Leaks
Identifying common leaks is an important step in attic insulation installation. To make sure your insulation performs effectively, it’s vital to detect and repair any air leaks in your attic. Here are some key points to keep in mind:
Visual Inspection: Start by visually examining your attic for any visible gaps, cracks, or holes where air could be escaping or entering.
Use a Smoke Pencil: A smoke pencil can assist you in identifying air leaks by displaying the movement of air when pointed towards potential leak areas.
Check Insulation Gaps: Search for areas where insulation may be insufficient or compacted, as these areas can indicate potential leaks.
Perform a Blower Door Test: Ponder conducting a blower door test to evaluate the overall air tightness of your home and identify specific leakage areas.
Choosing Proper Sealants
To effectively seal air leaks in your attic during the insulation installation process, it’s important to choose the proper sealants that will provide a durable and airtight barrier. Proper application of sealants is vital to ensure that all gaps and cracks are effectively sealed, preventing air leakage and maximizing the insulation’s efficiency.
When selecting sealants, opt for options that are specifically designed for the materials in your attic, such as foam, caulk, or weatherstripping, to ensure compatibility and long-lasting performance.
Consider the location and size of the leaks when choosing sealants, as some may be more suitable for larger gaps while others work best for smaller cracks. Prioritize sealants that offer flexibility and durability to withstand temperature changes and movement without cracking or breaking.
Additionally, sealants with low VOC (volatile organic compound) levels should be looked for to maintain indoor air quality.
Applying Sealing Techniques
In the process of attic insulation installation, a key aspect to focus on is applying sealing techniques to effectively seal air leaks. Ensuring proper air sealing is essential for maximizing insulation effectiveness and energy efficiency in your home. Here are some DIY sealing techniques and the benefits they provide:
Identify Leaks: Begin by inspecting common areas where air leaks occur, such as around windows, doors, electrical outlets, and plumbing penetrations.
Use Caulk and Weatherstripping: Seal gaps and cracks with caulk to prevent air leakage. Install weatherstripping around doors and windows to create a tight seal.
Apply Foam Sealant: Use expanding foam sealant to fill larger gaps and openings in the attic, ensuring a more airtight space.
Insulate Attic Hatches: Seal and insulate the attic hatch or door to prevent heat loss and maintain consistent temperatures in your home.
Ensuring Proper Ventilation
Proper airflow is vital for attic insulation installation. Ensuring sufficient air circulation in your attic is essential for ventilation enhancement, energy conservation, moisture management, and regulating attic temperature. Without adequate airflow, your insulation may not function at its best, resulting in potential issues like mold growth, reduced energy efficiency, and uncomfortable indoor temperatures.
To boost ventilation, consider installing soffit vents to allow fresh air into the attic and roof vents to facilitate the escape of hot air. This setup encourages air movement, preventing moisture accumulation and maintaining a steady attic temperature.
Furthermore, ridge vents can be incorporated along the roof peak to support airflow from the soffit vents to the roof vents, ensuring a well-balanced airflow throughout the attic space.
Safety Precautions to Follow
For best safety during attic insulation installation, prioritizing precautionary measures is key. When starting on DIY techniques for insulation installation, it’s essential to follow safety precautions to ensure a successful and secure process. Here are some safety guidelines to keep in mind:
Protective Gear: Prioritize your safety by wearing suitable protective gear such as safety glasses, gloves, a dust mask, and long-sleeved clothing. This will shield you from potential irritants and keep you safe from any debris in the attic.
Proper Ventilation: Verify there’s proper ventilation in the attic before commencing the insulation process. Good airflow will help prevent the accumulation of toxins or harmful fumes, making the environment safer for you to work in.
Safe Access: Utilize a sturdy and secure ladder to enter the attic. Ensure the ladder is correctly positioned and always have someone informed of your location in case of an emergency.
Electrical Precautions: Before beginning any work, switch off the electricity in the attic to prevent any electrical hazards. Use battery-powered lighting sources instead of depending on the attic’s lighting system.
Insulating Attic Access Points
Insulating attic access points is a critical step in ensuring the effectiveness of your overall insulation. One key area to focus on is the attic hatch. If not properly insulated, this access point is often a significant source of heat loss.
Consider installing an insulation cover specifically designed for attic hatches to address this. These covers are typically made of materials like foam board or reflective insulation to provide a barrier against heat transfer.
When selecting an insulation cover for your attic hatch, make sure it fits securely and is easy to remove when you need to access the attic. The cover should be thick enough to provide adequate insulation but not too bulky that it causes difficulty in handling.
Additionally, ensure that the cover has a good seal around the edges to prevent air leakage.
Inspecting and Maintaining Insulation
Maintaining your attic insulation’s effectiveness over time requires regular inspection and maintenance. Proper upkeep aids in preserving energy efficiency and ensures a comfortable living environment. Here are some essential steps to inspecting and maintaining your attic insulation:
Check for Moisture Build-Up: Moisture can undermine the efficiency of your insulation and lead to mold growth. Regularly examine the attic for any signs of water leaks or condensation. Address any sources of moisture promptly to prevent damage and uphold air quality.
Monitor Insulation Depth: Over time, insulation can settle, reducing its efficiency in regulating temperature and saving energy. Use a tape measure to check the depth of insulation in different areas of the attic. Add more insulation as necessary to maintain optimal energy savings.
Seal Air Leaks: Inspect the attic for any gaps, cracks, or openings that may allow air to escape or enter the living spaces. Proper sealing aids in temperature regulation and prevents energy wastage.
Schedule Regular Inspections: Make it a habit to inspect the attic insulation at least once a year. This proactive approach can help in identifying issues early on and addressing them before they escalate, ensuring long-term effectiveness and savings.
Summary
Congratulations on successfully insulating your attic! By following this DIY guide, you have transformed your attic into a cozy, energy-efficient space. You’ve conquered the insulation batts like a pro, ensuring your home stays warm in the winter and cool in the summer. Remember to inspect and maintain your insulation regularly to keep enjoying the benefits of a well-insulated attic. Keep up the great work!
Recent Posts
Top Attic Air Sealing Techniques for Insulation
Have you ever considered how much energy might be wasted through unnoticed gaps in your
Top 10 Attic Air Sealing Techniques for Insulation
Just as a tightly sealed ship avoids leaks and remains buoyant, your attic’s air sealing
What Are the Best Attic Air Sealing Techniques?
When it comes to attic air sealing, understanding the common leakage points is vital for