Contents
When it comes to giving your attic a fresh start, removing old insulation can be a surprisingly straightforward task. You’ll want to begin by identifying the type of insulation you’re dealing with, as this will influence your approach. By gathering the right tools and prioritizing safety, you can tackle this project effectively. But the process doesn’t just stop at removal; understanding what comes next can transform your attic into a more energy-efficient space. Curious about how to maximize your efforts and potentially save on energy bills?
Key Takeaways
- Identify the insulation type in your attic to determine the best removal method and safety precautions needed for effective handling.
- Use essential hand tools like utility knives and heavy-duty gloves to ensure a safe and efficient insulation removal process.
- Consider recycling insulation materials at local centers or donating usable insulation to charities to minimize waste and support the community.
- Seal air leaks and upgrade HVAC systems post-removal to maximize energy efficiency and reduce long-term energy costs in your home.
- Maintain an organized workspace and wear protective gear, like dust masks and goggles, to ensure safety during the insulation removal process.
Understanding Attic Insulation Types
When it comes to understanding attic insulation types, you’ll find a variety of options available, each with its own benefits and drawbacks. Two of the most common types are fiberglass insulation and cellulose insulation, both of which can significantly impact your home’s energy efficiency.
Fiberglass insulation, often seen as pink batts or loose fillings, is made from fine glass fibers. It’s lightweight, non-combustible, and resistant to moisture, making it a popular choice. Its R-value, a measure of thermal resistance, typically ranges from 2.9 to 4.3 per inch, which means it effectively keeps your home warm in winter and cool in summer.
However, it can be irritating to handle, so wearing protective gear is crucial during installation or removal.
On the other hand, cellulose insulation is made from recycled paper products, treated for fire resistance. This eco-friendly option boasts a higher R-value, generally around 3.1 to 3.7 per inch, and is excellent for filling gaps and crevices, providing a snug fit.
It’s also less likely to settle over time, maintaining its effectiveness. However, cellulose can absorb moisture, which could lead to mold issues if not properly managed.
Understanding these types helps you make informed decisions about which insulation best suits your needs. Each option has its unique characteristics, so consider factors like environmental impact, installation ease, and long-term performance when choosing the right insulation for your attic.
Assessing Your Insulation Needs
Before you remove any attic insulation, it’s crucial to identify the type of insulation currently in place.
Each type has different properties that affect energy efficiency, so evaluating how well your insulation performs can help you make informed decisions.
Understanding these factors will guide you in selecting the best insulation solution for your home.
Identify Insulation Type
Identifying your insulation type is crucial for assessing your insulation needs effectively. You’ll find various insulation materials in attics, each with unique insulation properties that impact your home’s energy efficiency and comfort. Common types include fiberglass, foam board, and cellulose.
Start by inspecting your attic. If you see fluffy, pink or yellow batts, you’re likely dealing with fiberglass insulation, known for its affordability and decent thermal performance.
If it looks like tiny flakes or is densely packed, that might be cellulose, which is made from recycled paper and offers good soundproofing.
Foam board insulation, rigid and often blue or green, provides excellent thermal resistance but can be pricier.
Understanding these insulation types helps you make informed decisions about removal and replacement, ensuring you choose materials that best meet your needs.
Evaluate Energy Efficiency
Your home’s energy efficiency hinges significantly on the quality and type of insulation you have in your attic. To ensure you’re getting the most bang for your buck, consider conducting energy audits. These assessments help identify leaks, drafts, and areas where insulation may be lacking. Additionally, using thermal imaging can pinpoint cold spots and areas that require improvement.
To give you a clearer understanding of different insulation types and their efficiency, take a look at the table below:
| Insulation Type | R-Value (per inch) |
|---|---|
| Fiberglass Batts | 2.9 – 3.7 |
| Cellulose | 3.1 – 3.7 |
| Rock Wool | 3.0 – 3.3 |
| Radiant Barrier | N/A |
Tools and Equipment Required
To safely and effectively remove attic insulation, you’ll need a few essential hand tools, such as a utility knife and a dust mask.
Don’t forget to equip yourself with protective gear like gloves and goggles to guard against irritation and debris.
Finally, having disposal equipment, like heavy-duty trash bags or a dumpster, will ensure you can properly manage the insulation once it’s removed.
Essential Hand Tools
When tackling the task of removing attic insulation, having the right hand tools can make all the difference in efficiency and safety. You’ll want to gather the hand tool essentials that will streamline your insulation removal process.
Start with a sturdy utility knife, or insulation saw. These tools will help you cut through batts or rolls with ease. A pair of heavy-duty gloves is also crucial; they’ll protect your hands from sharp edges and irritants.
Next, consider a long-handled rake or a broom. These tools are perfect for pulling loose insulation away from walls and corners without needing to crawl around too much. A dustpan or a sturdy trash bag will help you collect and dispose of the material efficiently.
Lastly, a good-quality ladder will be essential for reaching higher areas safely. Ensure it’s stable and positioned properly.
Protective Gear Needed
Before diving into the removal of attic insulation, it’s crucial to gear up with the right protective equipment. This isn’t just about comfort; it’s about your safety. Insulation materials can be irritating to your skin and eyes, so wearing protective gear is essential.
Here’s a handy table to help you understand what’s needed:
| Protective Gear | Purpose |
|---|---|
| Protective Gloves | Prevent skin irritation and cuts |
| Safety Goggles | Protect your eyes from irritants |
| Dust Mask | Filter out harmful particles in the air |
| Long-Sleeved Shirt | Protect your arms from insulation |
| Sturdy Boots | Protect your feet and provide grip |
When you put on your protective gloves, you’ll shield your hands from potential irritants while handling the insulation. Safety goggles are equally important, keeping your eyes safe from dust and debris. With these essentials in place, you’ll feel more confident and secure during the process. Remember, taking these precautions keeps you safe and sets a positive example for anyone joining you in this project.
Disposal Equipment Required
Having the right disposal equipment is essential for safely and efficiently removing attic insulation. Start by gathering heavy-duty trash bags or containers that can withstand the weight and potentially sharp edges of insulation materials. You’ll want to ensure these are durable enough to hold your debris without tearing.
Consider renting a dumpster if you’re dealing with a large volume of insulation. This disposal method simplifies the process, allowing you to toss debris as you work without multiple trips to the landfill. Equipment rental companies often have options tailored for home projects, making it easy to find what you need.
A vacuum specifically designed for insulation removal can be a game-changer. It minimizes dust and increases efficiency by sucking up loose material directly from the attic. Additionally, a utility knife or shears will help you cut the insulation into manageable pieces for disposal.
Don’t forget about a sturdy ladder to access your attic safely. Having the right tools makes the job easier and ensures you’re part of a community that values safety and efficiency in home improvement projects.
Step-by-Step Removal Process
Removing attic insulation can seem daunting, but with the right approach, you can tackle it effectively. Start with adequate attic preparation. Clear out the attic space, removing any stored items that might obstruct your way.
Gather your tools and materials, including a utility knife, trash bags, and a vacuum designed for insulation removal.
Next, it’s essential to identify the type of insulation you’re dealing with. Whether it’s fiberglass, cellulose, or foam, each type has its own method of removal. If you’re opting for insulation alternatives, consider how these materials will impact energy efficiency in your home.
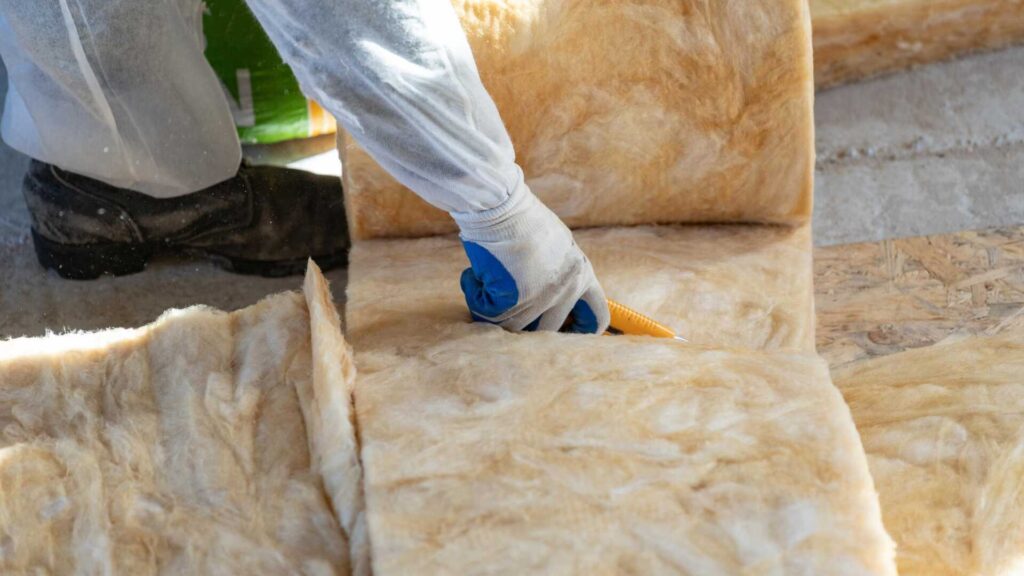
Once you’ve assessed the situation, begin by cutting the insulation into manageable sections. Use your utility knife for fiberglass insulation, but be cautious of the fibers. For cellulose, you might find it easier to scoop it into your trash bags.
As you progress, ensure you’re placing the removed insulation directly into your disposal bags to keep the area organized. If you’re using a vacuum, be sure to cover the intake to prevent any debris from escaping.
Continue working methodically, ensuring you’re cleaning as you go. After removing all the insulation, take a moment to inspect for any signs of moisture or damage, as this will inform your next steps.
Finally, once you’ve finished, consider your insulation alternatives carefully. Choosing the right material can enhance your home’s energy efficiency and comfort for years.
Safety Precautions to Consider
Safety is a crucial aspect to consider when tackling attic insulation removal. Before diving into your project, it’s essential to equip yourself with the right safety gear and ensure proper ventilation in your workspace. This will protect you and create a comfortable environment as you work.
Here are some key precautions to keep in mind:
Wear a respirator mask: This keeps harmful particles and dust out of your lungs, especially if you’re dealing with older insulation materials.
Use protective eyewear: Safeguarding your eyes from flying debris or irritating dust is vital for your comfort and safety.
Don gloves and long sleeves: This protects your skin from sharp edges, irritants, and potential allergens commonly found in insulation.
Ensure proper ventilation: Open windows and use fans to circulate air. This helps reduce dust accumulation and keeps the air fresh while you work.
Disposal Options for Insulation
Once you’ve safely removed the attic insulation, figuring out how to dispose of it properly is the next step. You want to ensure you’re not just tossing it in the trash without considering the best options available.
First, check if your insulation material is recyclable. Many types, like fiberglass or cellulose, can be recycled. Look for local recycling centers that accept these materials. They often have specific guidelines, so give them a call or check their website to confirm what they accept.
If your insulation is contaminated or made from hazardous materials, such as certain forms of old foam insulation, you must handle it differently. Local regulations usually have strict rules regarding hazardous waste. It’s crucial to find a disposal facility that specializes in hazardous materials to ensure you’re compliant and protecting the environment.
Another option is to contact your local waste management facility. They may offer special collection days for insulation and other building materials. This way, you can dispose of your insulation safely while also connecting with your community.
Lastly, consider donating usable insulation to local charities or habitat organizations. They might appreciate the materials for their projects, and you’ll feel good knowing you’re helping others.
Maximizing Energy Savings Post-Removal
After taking out your attic insulation, maximizing energy savings should be your next priority.
You’ve made a big step towards improving your home’s efficiency, and now it’s time to capitalize on that effort.
Consider implementing these energy-efficient upgrades and insulation alternatives to ensure you’re getting the most out of your space:
Seal Air Leaks: Check for gaps around windows, doors, and vents. Use caulk or weatherstripping to seal any leaks, preventing air from escaping or entering.
Install Radiant Barrier: A radiant barrier can reflect heat away from your home in summer and keep warmth in during winter, enhancing your attic’s performance.
Upgrade HVAC System: If your system’s outdated, consider upgrading to a more energy-efficient model. This can drastically reduce your energy consumption and costs.
Add New Insulation: Choose insulation materials that align with your home’s needs. Options like cellulose can provide better thermal resistance than traditional fiberglass.
Recap
By removing your attic insulation, you’re not just clearing out the old; you’re paving the way for a snugger, more energy-efficient home. Think of it as shedding winter layers to embrace the warmth of spring. With the right tools and precautions, you’ll transform a daunting task into a rewarding project. Remember, the effort you put in now can lead to cozy savings for years to come—like planting seeds that blossom into a bountiful harvest.
Recent Posts
Top Attic Air Sealing Techniques for Insulation
Have you ever considered how much energy might be wasted through unnoticed gaps in your
Top 10 Attic Air Sealing Techniques for Insulation
Just as a tightly sealed ship avoids leaks and remains buoyant, your attic’s air sealing
What Are the Best Attic Air Sealing Techniques?
When it comes to attic air sealing, understanding the common leakage points is vital for