Contents
When you’re looking to remove attic insulation efficiently, it’s crucial to start by assessing your current insulation for damage and effectiveness. You’ll need to choose the right tools and safety equipment tailored to your specific materials. Working methodically in small sections keeps the area manageable and minimizes dust and debris. However, navigating the complexities of disposal and potential contamination can be tricky. There’s more to consider that could impact your project significantly, and understanding these strategies can make all the difference in achieving a successful outcome.
Key Takeaways
- Inspect the attic for moisture, pests, and existing insulation R-values to determine removal needs and goals.
- Utilize appropriate personal protective equipment (PPE) and ensure proper ventilation during the removal process to safeguard against contaminants.
- Use specialized tools like utility knives and vacuums tailored to the insulation type for efficient and safe removal.
- Collect and dispose of old insulation in heavy-duty trash bags or through recycling programs where applicable to minimize environmental impact.
- Consider hiring professionals for safe removal, especially when dealing with hazardous materials like asbestos, to ensure compliance and efficiency.
Assessing Your Insulation Needs
Before diving into insulation removal, it’s crucial to assess your insulation needs accurately. An insulation assessment will help you determine whether your current insulation is still effective or if it’s time for a change.
Start by inspecting your attic for signs of wear, moisture, or pest damage. These indicators can affect the overall performance of your insulation.
Next, conduct an insulation evaluation by measuring the thickness and R-value of your existing insulation. R-value measures the insulation’s resistance to heat flow; higher values indicate better insulation. You can easily find R-value charts online to compare your findings. If your insulation falls short of the recommended R-values for your climate zone, it might be time to consider removal.
Also, check for air leaks around vents, light fixtures, and any other openings. Air leaks can significantly diminish the effectiveness of your insulation, leading to increased energy costs and discomfort in your home. Identifying these leaks is part of a comprehensive insulation assessment that ensures you’re addressing all aspects of energy efficiency.
Finally, consider your future insulation goals. Are you looking to improve energy efficiency, reduce noise, or enhance comfort? Understanding your objectives will guide your decisions throughout the removal process and help you choose the right replacement materials later.
Choosing the Right Tools
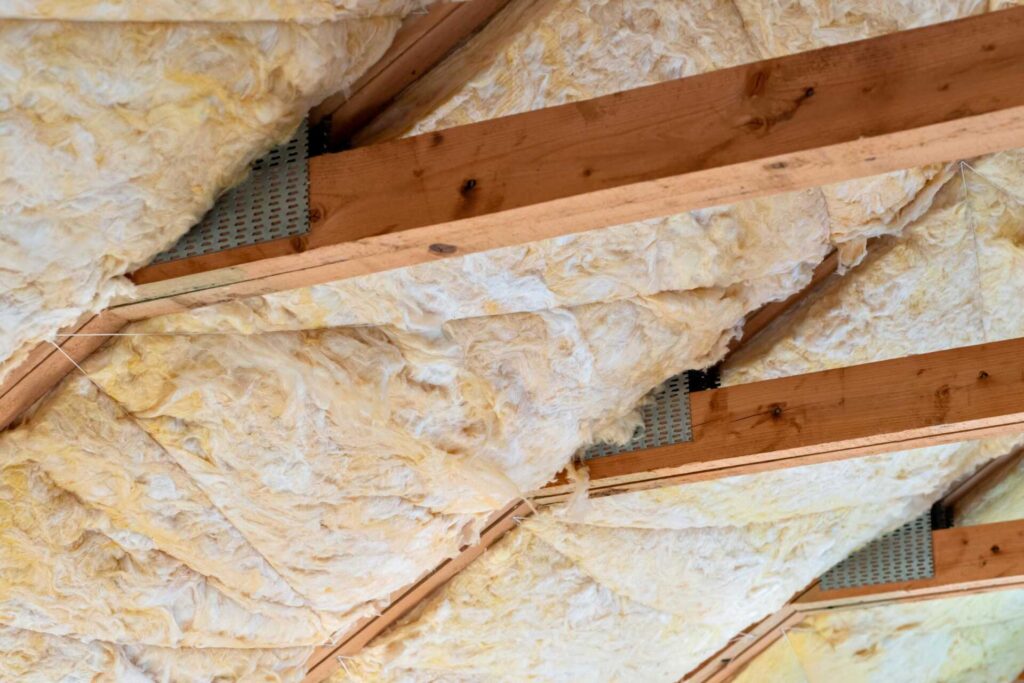
Once you’ve assessed your insulation needs and decided to proceed with removal, selecting the right tools is vital for a smooth process. The type of insulation you’re dealing with—whether it’s fiberglass, cellulose, or foam—will dictate the specific tools you’ll need. Having the right equipment makes the job easier and ensures you maintain your space’s integrity and minimize any potential mess.
Here’s a quick reference table to help you choose the appropriate tools based on insulation types:
| Insulation Type | Recommended Tools | Tool Maintenance Tips |
|---|---|---|
| Fiberglass | Protective gloves, masks, utility knife, insulation removal vacuum | Keep blades sharp, clean vacuum filters regularly |
| Cellulose | Dust masks, gloves, heavy-duty trash bags, blower | Inspect for clogs and ensure bags are sturdy |
| Foam | Scraper, utility knife, protective eyewear, trash bags | Inspect for clogs ensure bags are sturdy |
When you use these tools, remember that proper tool maintenance is key to effectiveness and safety. Regularly check your equipment for wear and tear, and ensure they’re clean after each use. This not only prolongs the life of your tools but enhances your efficiency during the insulation removal process. With the right tools and maintenance plan in place, you’re setting yourself up for a successful insulation removal that fosters a comfortable, energy-efficient living environment.
Safety Precautions to Consider
When tackling attic insulation removal, it’s crucial to prioritize safety to protect yourself from potential hazards. The first step in ensuring a safe working environment is conducting a thorough risk assessment. Identify any potential dangers, such as sharp objects, mold, or electrical wiring, that could pose threats during the removal process. Understanding these risks will help you prepare adequately.
Equipping yourself with the right personal protective equipment (PPE) is essential. Start with a high-quality respirator to shield your lungs from dust and harmful particles. Safety goggles will protect your eyes from debris, while sturdy gloves will keep your hands safe from sharp edges.
Don’t forget long-sleeve clothing and durable work boots to minimize skin exposure and provide added protection.
Ensure your workspace is well-ventilated. Proper airflow helps reduce the concentration of airborne contaminants, making it safer for you to work. Additionally, consider using a sturdy ladder or scaffold to reach difficult areas safely—never compromise on stability.
Before starting, inform others in your household about your project. This communication keeps them aware of your activities and ensures they steer clear of the work area, reducing the risk of accidents.
Lastly, have a first aid kit on hand. Be prepared for minor injuries that could occur during the process. By prioritizing safety and utilizing proper PPE, you’ll create a safer environment, allowing you to focus on efficiently removing attic insulation with confidence.
Effective Removal Techniques
To effectively remove attic insulation, start by gathering the right tools and materials. You’ll need a utility knife, safety goggles, gloves, a dust mask, and large garbage bags or a vacuum specifically designed for insulation removal. These removal techniques will help streamline your process and ensure safety.
Begin by assessing the type of insulation materials in your attic. If you’re dealing with fiberglass batts, carefully cut them into manageable sections using your utility knife. Avoid tearing the insulation, as this can release particles into the air.
For blown-in insulation, a specialized vacuum can be your best friend. It’s designed to efficiently collect loose materials without creating a mess.
When removing batts, gently pull them out and place them directly into your garbage bags or your vacuum’s collection system. If you encounter any stubborn sections, use your utility knife to slice through the material, making it easier to handle.
Always remember to work in small sections to maintain control and minimize dust.
After you’ve removed the bulk of the insulation, check for any remaining debris. A quick pass with a vacuum will help you clear out any leftover particles.
By following these effective removal techniques, you’ll enhance the efficiency of your insulation project and foster a cleaner, healthier attic environment for your home.
Handling Contaminated Materials
Handling contaminated materials during attic insulation removal requires careful attention to safety and health. Before you start the removal process, conduct a thorough contamination assessment to identify potential hazards such as mold, rodent droppings, or asbestos. This assessment is crucial in determining the appropriate safety measures and the type of protective gear you’ll need.
Once you’ve assessed the contamination levels, it’s vital to equip yourself with personal protective equipment (PPE). This includes gloves, masks, goggles, and coveralls. Proper PPE safeguards your health and ensures you’re prepared to handle materials safely.
When you begin the actual material handling, follow a systematic approach. Use heavy-duty trash bags to collect insulation and any contaminated debris. Seal these bags tightly to prevent any contaminants from escaping. If you’re dealing with hazardous materials, consider hiring a professional to manage the removal, as they’ve the necessary training and equipment.
During the removal process, avoid disturbing contaminated materials more than necessary, as this can release harmful particles into the air. Maintain a clean workspace and regularly dispose of waste to minimize exposure.
Finally, after the insulation is removed, ensure that your attic is thoroughly cleaned and treated for any remaining contaminants. This step is vital for creating a safe environment and preventing future issues.
Managing Dust and Debris
After addressing contaminated materials, managing dust and debris becomes a top priority during attic insulation removal. Proper dust control is essential for your health and for maintaining a clean work environment.
You’ll want to start by sealing off the attic space to prevent dust from spreading throughout your home. Use plastic sheeting to cover openings and vents, ensuring you create a barrier that keeps the dust contained.
Next, invest in high-quality vacuum systems equipped with HEPA filters. These vacuums are specifically designed for construction debris and will effectively capture fine dust particles. While you’re removing insulation, use a vacuum with a long hose to minimize the dust that escapes.
Always wear protective gear, including masks and goggles, to shield yourself from airborne particles.
Debris management is equally important. As you pull out old insulation, collect it in heavy-duty trash bags or containers for easier disposal. This reduces clutter and helps contain dust.
If you’re dealing with larger debris, consider using a bin or a dumpster, which allows for efficient removal without cluttering your workspace.
Regularly check your surroundings for any accumulated dust or debris, and clean up as you go. This proactive approach will help maintain a safe and organized work area, making your insulation removal project smoother and more efficient.
Proper Disposal Methods
While you focus on removing old insulation, it’s crucial to consider proper disposal methods to ensure compliance with local regulations and environmental safety. Disposing of insulation improperly can lead to penalties and harm to the environment. Here’s how you can handle the process effectively.
First, identify the type of insulation you’re dealing with. Many types can be recycled, while others may be classified as hazardous waste. As a responsible homeowner, it’s your duty to check local guidelines on recycling materials and the disposal of hazardous waste.
Take a look at the following table for a quick reference on disposal options:
| Insulation Type | Disposal Method |
|---|---|
| Fiberglass | Recycle at specialized centers |
| Cellulose | Compost or recycle |
| Foam board | Check for recycling programs |
| Asbestos | Hire a licensed professional |
By following these guidelines, you comply with regulations and contribute to a healthier environment. Use recycling materials whenever possible; it helps reduce waste and promotes sustainability. If you have hazardous waste like asbestos, don’t attempt a DIY approach. Always hire professionals to ensure safe removal and disposal.
Taking these steps keeps your home safe and fosters a sense of community responsibility. After all, you’re part of a larger effort to protect our environment for future generations.
Insulation Replacement Options
Choosing the right insulation replacement option can significantly enhance your home’s energy efficiency and comfort. When considering insulation types, you’ll find several materials available, each offering unique benefits.
Fiberglass insulation is popular due to its affordability and effectiveness, but ensure it’s properly installed to maximize its performance.
Spray foam insulation is another excellent choice, providing superior air sealing and a high R-value. Its material durability is remarkable, making it an ideal option for those wanting long-term results. However, it can be more expensive upfront, so weigh your budget against its energy-saving potential.
Cellulose insulation, made from recycled paper products, is an eco-friendly alternative that also provides excellent thermal resistance. It’s treated to be fire-resistant and can fit into tight spaces, making it a versatile option for various attic configurations.
Mineral wool, or rock wool, is another insulation type that boasts fire resistance and soundproofing qualities. Its durability against moisture can greatly benefit homes in humid climates.
Consider factors like installation ease, R-value, and long-term performance when choosing your insulation replacement. Each of these insulation types has its pros and cons, so think about what aligns with your home’s needs and your lifestyle.
Benefits of Professional Services
Hiring professional services for attic insulation removal offers you expertise and knowledge that ensures the job is done correctly.
These specialists are trained to handle the materials safely and efficiently, minimizing risks associated with DIY methods.
Expertise and Knowledge
Regarding attic insulation removal, relying on professionals ensures that the job is done efficiently and safely. Their expertise in insulation performance and installation techniques can significantly enhance your home’s energy efficiency.
Professionals have the training and experience to identify the best methods for removing old insulation without damaging your property. They understand the nuances of different insulation materials, which allows them to tailor their approach to your specific needs.
By choosing a professional service, you benefit from their knowledge of local building codes and regulations, ensuring compliance and peace of mind. They’ll also be familiar with the latest techniques and equipment, which can lead to quicker, more effective removal processes. This means less disruption to your daily life and a cleaner attic space.
Moreover, professionals can assess any underlying issues, such as mold or pests, that may have been exacerbated by inadequate insulation. Addressing these problems early on can save you money in the long run and improve your home’s overall health.
Safety and Efficiency
Professional insulation removal ensures adherence to safety standards and maximizes efficiency throughout the process.
When you hire experts, you benefit from their use of proper safety gear, which includes gloves, masks, and protective eyewear. This significantly reduces the risk of injury or health hazards associated with insulation materials, especially if they contain irritants or harmful substances.
Additionally, professionals are trained to handle insulation materials safely and effectively, ensuring removal efficiency.
Their experience allows them to assess the situation quickly, develop a tailored plan, and execute it with precision. This means less time spent on the job, minimizing disruptions to your home life.
Enhancing Home Energy Efficiency
Removing outdated insulation can significantly boost your home’s energy efficiency.
By clearing out old materials, you create a better environment for modern energy-saving techniques to take effect.
This proactive approach enhances comfort and helps lower your energy bills.
Benefits of Insulation Removal
How can removing outdated insulation boost your home’s energy efficiency? By tackling old, ineffective insulation, you can create a more comfortable living environment while enjoying significant cost savings.
Outdated materials may harbor mold, pests, or allergens, all of which can negatively impact your home’s air quality. Removing this insulation enables you to start fresh, ensuring your home remains healthy and energy-efficient.
Consider these benefits of insulation removal:
Enhanced thermal performance: New insulation materials can dramatically improve your home’s ability to retain heat in the winter and stay cool in the summer.
Lower energy bills: With improved insulation, you’ll find that your heating and cooling systems don’t have to work as hard, leading to reduced energy costs.
Healthier indoor environment: Removing old insulation can decrease allergens and pollutants, resulting in better air quality for you and your family.
Energy-Saving Techniques
After removing outdated insulation, it’s time to implement energy-saving techniques that can further enhance your home’s efficiency.
First, consider upgrading your insulation material. Opt for high-R-value options that offer superior thermal performance, ensuring your home stays warm in winter and cool in summer.
Next, seal any gaps or cracks in your attic. Using caulk or spray foam can prevent air leaks, which significantly boosts energy efficiency by reducing your heating and cooling costs.
Don’t overlook the importance of proper ventilation; it helps maintain optimal humidity levels, which in turn protects your insulation and enhances its effectiveness.
Installing an energy-efficient attic fan can also help regulate temperature, further improving your home’s thermal performance.
Additionally, consider using radiant barriers, especially if you live in warmer climates. These barriers reflect heat away from your living spaces, decreasing the load on your HVAC system.
Lastly, regular maintenance is key. Check your insulation and ventilation annually to ensure they’re performing at their best.
Wrap-Up
Tackling attic insulation removal can seem daunting, but with the right strategies, it’s manageable. By assessing your insulation, choosing the right tools, and following safety precautions, you’ll streamline the process. Coincidentally, as you improve your attic, you also boost your home’s energy efficiency. Whether you DIY or hire professionals, each step contributes to a healthier living space. Remember, a well-insulated home isn’t just about comfort; it’s also a smart investment in your future.
Recent Posts
Top Blow-In Insulation Types for Energy Savings
Isn’t it fascinating how the right insulation can dramatically impact your energy bills? When you
Top 3 Efficiency Benefits of Blow-In Wall Insulation
When you’re considering ways to enhance your home’s efficiency, blow-in wall insulation might be one
7 Tips to Enhance Efficiency With Blow-In Insulation
To truly enhance efficiency with blow-in insulation, you need to focus on several key aspects