Contents
You might think that insulating your home is as complicated as launching a rocket, but choosing DIY blow-in insulation can actually simplify the process. By taking this approach, you cut costs and gain control over your home’s energy efficiency. Imagine transforming your living space into a more comfortable environment while potentially increasing its value. But before you jump in, there are essential considerations and techniques to master that could make all the difference in your project’s success.
Key Takeaways
- DIY blow-in insulation allows for significant savings on labor costs while maintaining control over your budget.
- It effectively fills gaps and voids, enhancing energy efficiency and comfort in your home.
- Quick installation can often be completed in just a few hours, minimizing disruption to daily life.
- Using eco-friendly materials promotes sustainability and a healthier living environment.
- Homeowners may qualify for tax credits and rebates for implementing energy-efficient improvements.
Benefits of Blow-In Insulation
When it comes to insulating your home, blown-in insulation offers several compelling benefits that make it a top choice for many homeowners. In this benefits overview, you’ll discover why this method stands out in the world of home insulation.
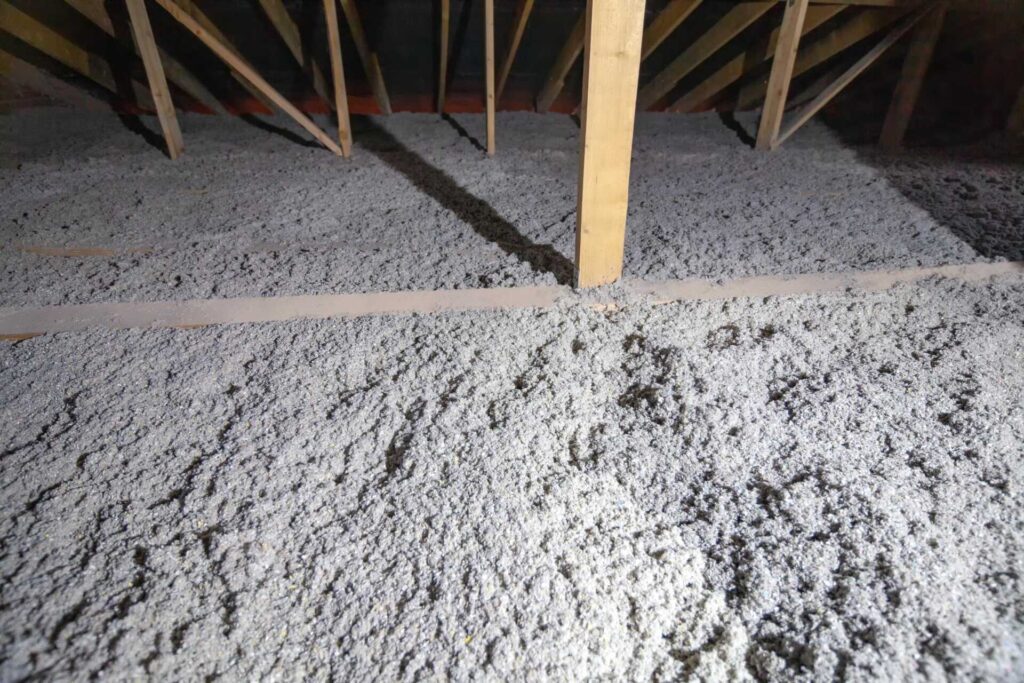
One of the major insulation advantages is its ability to fill gaps and voids that traditional batts can’t reach. This means you get a more complete thermal barrier, enhancing your home’s efficiency. As a result, you’ll notice a more comfortable living environment, with fewer drafts and improved temperature regulation throughout the seasons.
Another key benefit is the quick installation process. Unlike some other insulation methods that require extensive labor and time, blow-in insulation can often be completed in just a few hours. You’ll appreciate how easily this can fit into your busy schedule, allowing you to enjoy the comfort of your home sooner rather than later.
Additionally, blow-in insulation is often made from eco-friendly materials, which contributes to a healthier living space. By choosing this option, you’re investing in your home’s efficiency and the well-being of your family and the environment.
Lastly, blow-in insulation can be a great way to enhance your home’s value. Prospective buyers often look for energy-efficient features, and having this type of insulation can make your property more attractive.
Embracing blow-in insulation isn’t just about comfort; it’s a smart decision that benefits you and the community around you.
Cost-Effectiveness of DIY Options
DIY insulation projects can be a cost-effective way to enhance your home’s energy efficiency without breaking the bank. When you choose to tackle blow-in insulation yourself, you’re not just saving money on labor costs; you’re also gaining control over your DIY budget.
By purchasing the materials directly, you can often find better deals than what contractors might offer. Plus, it allows you to customize your insulation choice based on your specific needs.
One of the most appealing aspects of DIY insulation is the insulation savings. Many homeowners find that doing it themselves can lead to significant reductions in their energy bills. With proper insulation, you can keep your home warmer in winter and cooler in summer, which means less reliance on heating and cooling systems.
Over time, this pays for the initial costs of insulation and adds up to substantial savings.
Moreover, getting involved in a DIY project fosters a sense of belonging to a community of like-minded homeowners who want to improve their spaces. Sharing your journey, tips, and successes with friends or online forums can deepen your connection with others who value home improvement.
Tools Needed for Installation
Before diving into your blow-in insulation project, it’s essential to gather the right tools to ensure a smooth installation process. You’ll want to have the following items on hand to tackle insulation types effectively and master the techniques involved.
First, you’ll need a blow-in insulation machine, which is often available for rent at home improvement stores. This machine is crucial for distributing insulation material evenly into your walls or attic. Don’t forget to pick up the appropriate insulation material, whether it’s cellulose, fiberglass, or another type. Each has its unique properties, so choose based on your specific needs.
Next, equip yourself with safety gear. A dust mask, goggles, and gloves will protect you from any irritating particles during the installation. You also might want a ladder to reach high areas safely; make sure it’s sturdy and positioned securely.
For the actual installation techniques, having a utility knife is essential for cutting insulation bags open and trimming excess material. A measuring tape will help you ensure you’re filling each space adequately, while a long-reaching tool can assist in getting insulation into tight corners.
Lastly, keep a broom or vacuum nearby for quick clean-up. It’s all about making the process efficient and keeping your workspace tidy.
With the right tools, you’ll be well on your way to achieving a comfortable, energy-efficient home with your DIY blow-in insulation project!
Step-by-Step Installation Process
With your tools ready, it’s time to get started on the blow-in insulation installation process. This project can feel daunting, but by breaking it down into manageable steps, you’ll find that you’re more than capable of getting it done.
Here’s a straightforward guide to help you through:
Prepare the Area: Clear any obstacles and ensure the space is well-ventilated.
Measure and Calculate: Determine how much insulation you’ll need based on the area you’re covering. DIY resources can help you with this!
Set Up the Machine: Follow the manufacturer’s instructions to set up your blow-in insulation machine. Make sure it’s plugged in and ready to go.
Fill the Spaces: Begin filling the cavities, ensuring you evenly distribute the insulation. Use your installation tips to avoid overpacking.
Seal Up: Once you’re done, seal any access points with drywall or other materials to secure the insulation.
Safety Precautions to Consider
Before you start installing blow-in insulation, it’s crucial to prioritize safety.
Make sure you’ve got the right protective gear, ensure proper ventilation, and handle the materials carefully to avoid any hazards.
Taking these precautions will help keep you safe and make your project go smoothly.
Protective Gear Requirements
When you tackle DIY blow-in insulation, ensuring your safety should be your top priority. This project can be messy, and you’ll want to protect yourself from any potential hazards.
Here’s a quick checklist of protective gear you should consider wearing:
- Safety goggles: Shield your eyes from dust and debris.
- Protective gloves: Keep your hands safe from irritation and cuts.
- Dust mask or respirator: Prevent inhalation of insulation particles.
- Long-sleeve shirt and pants: Protect your skin from irritation and allergens.
- Knee pads: If you’re working on your knees, these will save you discomfort.
Ventilation During Installation
Good ventilation is crucial during the installation of blow-in insulation to maintain a safe working environment. Proper air circulation helps reduce the concentration of dust and particles that can accumulate while you work.
Before starting, check your ventilation requirements to ensure that fresh air can flow in while stale air is expelled. Open windows and doors or use fans strategically to promote air movement.
If you’re working in an attic or enclosed space, it’s especially important to create a cross-breeze. This helps you breathe easier and keeps your workspace comfortable.
You might also consider using a respirator mask, even with good ventilation, to further safeguard your health.
Remember to periodically step outside for fresh air, especially during longer projects. By prioritizing ventilation, you’ll reduce the risk of respiratory issues and ensure a smoother installation process.
You’re improving your home’s energy efficiency and creating a safer space for yourself and your loved ones. So, take the time to set up proper ventilation—your health and project will thank you!
Handling Material Safely
Creating a safe workspace doesn’t stop at ventilation; handling insulation material properly is just as important.
To ensure your DIY blow-in insulation project goes smoothly, follow these safe handling and material storage tips:
Wear protective gear: Use gloves, goggles, and a mask to shield yourself from dust and particles.
Store materials properly: Keep insulation bags in a cool, dry place to prevent moisture damage.
Use appropriate tools: Ensure your blowing machine is in good condition to avoid accidents during installation.
Handle with care: Lift and move insulation bags carefully to prevent spills or tears.
Be mindful of your surroundings: Clear the workspace of unnecessary items to reduce the risk of tripping or injury.
Common Mistakes to Avoid
Have you ever wondered what mistakes to steer clear of when tackling DIY blow-in insulation? It’s easy to fall into traps that can lead to installation errors or material misconceptions.
First, don’t underestimate the importance of preparation. Take the time to measure the area accurately; improper measurements can result in insufficient insulation or excessive material waste.
Another common pitfall is neglecting to choose the right material for your needs. Many people assume all insulation types perform similarly, but that’s far from the truth. Research the specific benefits and drawbacks of the options you’re considering. This knowledge will save you from costly mistakes down the line.
When installing, make sure you’re using the right equipment. Some DIYers underestimate the importance of a quality blower machine, which can impact the consistency and effectiveness of the insulation. You want to achieve an even distribution throughout your space, so investing in the right tools is crucial.
Don’t overlook safety precautions, either. While you may be excited to get started, make sure you’re wearing protective gear and following all safety guidelines. Ignoring this step can lead to health risks from airborne particles.
Lastly, don’t rush the process. Take your time to ensure each step is done correctly.
Comparing Materials: Fiberglass vs. Cellulose
When it comes to choosing the right insulation for your home, comparing fiberglass and cellulose is essential. Both materials have their unique benefits and drawbacks, so understanding their properties can help you make an informed decision that suits your needs.
Fiberglass Properties:
Non-combustible: Fiberglass won’t ignite, adding a layer of safety.
Moisture-resistant: It’s less prone to mold growth compared to cellulose.
Longevity: Fiberglass can last for decades without settling, maintaining its R-value.
Lightweight: Easy to handle, making installation simpler.
Costs: Generally lower upfront costs compared to cellulose.
Cellulose Advantages:
Eco-friendly: Made from recycled paper, cellulose is a sustainable option.
Air sealing: It can fill gaps and voids better than fiberglass, reducing air leaks.
Higher R-value: Cellulose often offers better thermal performance in certain applications.
Soundproofing: It acts as a sound barrier, providing a quieter home environment.
Pest control: Many cellulose products include treatments to deter insects.
Ultimately, it boils down to your specific requirements and values. If you prioritize sustainability and superior air sealing, cellulose might be the way to go.
On the other hand, if you’re looking for something lightweight and cost-effective, fiberglass could be your best bet.
Energy Efficiency Gains
By adding blow-in insulation, you can significantly lower your energy bills while keeping your home comfortable year-round.
Improved temperature regulation means you’re less reliant on heating and cooling systems, which is a win for both your wallet and the environment.
Plus, choosing eco-friendly materials helps reduce your overall environmental impact, making your home a more sustainable place to live.
Lower Energy Bills
Investing in DIY blow-in insulation can significantly lower your energy bills while enhancing your home’s overall energy efficiency. By improving the insulation effectiveness in your walls and attic, you’ll experience impressive energy savings. This benefits your wallet and contributes to a more sustainable lifestyle.
Here are some key reasons why DIY blow-in insulation is a smart choice for reducing your energy costs:
Lower heating and cooling costs: Well-insulated homes require less energy to maintain comfort.
Increased home value: Energy-efficient upgrades can make your property more appealing to future buyers.
Tax credits and rebates: You might qualify for financial incentives for making energy-efficient improvements.
Environmentally friendly: Reducing energy consumption helps lower your carbon footprint.
DIY satisfaction: The sense of accomplishment from completing a home project can be incredibly rewarding.
When you choose blow-in insulation, you’re not just making an improvement—you’re investing in a more comfortable, cost-effective, and greener future for your family.
Embrace the benefits and take pride in creating a space that reflects your values and your commitment to energy efficiency.
Improved Temperature Regulation
Maximizing your home’s insulation leads to significantly improved temperature regulation throughout the year. When you choose DIY blow-in insulation, just adding a layer of comfort and ensuring temperature consistency in every room. This means no more cold drafts in winter or stuffy heat in summer.
With blow-in insulation, you can create a cozy environment that adapts to the changing seasons. You’ll notice how easily your home maintains a comfortable temperature, allowing you to enjoy your space without constantly adjusting the thermostat. This seasonal comfort translates to a more enjoyable living experience, making your home feel like a welcoming retreat no matter the weather outside.
Additionally, effective insulation helps in reducing the strain on your heating and cooling systems. This means they won’t have to work as hard to maintain your desired temperature, which can lead to longer-lasting appliances and lower energy consumption.
Environmental Impact Reduction
A significant benefit of DIY blow-in insulation is its contribution to energy efficiency, which can lead to lower utility bills and a reduced carbon footprint.
By choosing sustainable materials, you’ll enhance your home’s comfort and make a positive impact on the environment.
Here’s how your choice can yield substantial environmental benefits:
Lower Energy Consumption: Effective insulation reduces the need for heating and cooling, conserving energy.
Use of Recycled Materials: Many blow-in insulation products are made from recycled content, minimizing waste.
Long-Lasting Performance: Good insulation maintains its effectiveness over time, reducing the need for replacements.
Reduced Greenhouse Gas Emissions: By decreasing energy demand, you help lower emissions from power plants.
Promoting Renewable Resources: Some products utilize renewable materials, supporting a more sustainable industry.
Maintenance Tips for Longevity
Ensuring your blow-in insulation lasts for years requires regular check-ups and a few simple maintenance practices. Start with routine inspections to identify any issues early on. Check for signs of settling or gaps, especially in areas prone to moisture or temperature fluctuations, like attics and crawl spaces. A quick visual inspection can save you from bigger problems down the road.
Seasonal maintenance is key to keeping your insulation in top shape. Before winter hits, make it a habit to clear any debris from vents and eaves to prevent moisture buildup. During spring, check your insulation for any signs of water damage or pests. Addressing these issues promptly helps maintain the insulation’s effectiveness and your home’s comfort.
Don’t forget the importance of ventilation! Proper airflow can prevent condensation, which may compromise your insulation’s performance. If you notice increased humidity levels, consider installing vents or exhaust fans to improve air circulation.
Furthermore, be proactive in maintaining your home’s overall structure. Keep an eye on your roof, gutters, and siding to prevent leaks that could affect your insulation. It’s about creating a holistic environment where all components work together effectively.
When to Hire Professionals
When considering whether to tackle blow-in insulation on your own or call in the pros, it’s important to assess the complexity of the job.
While DIY can be rewarding, there are instances where professional expertise is invaluable. Here are some situations when you should think about hiring professionals:
Limited experience: If you’re unfamiliar with insulation techniques, it might be wise to get help.
Complex structures: Older homes or unique architectural designs may require specialized knowledge.
Health concerns: If you’re sensitive to dust or allergens, pros can handle the installation more safely.
Safety issues: Working in tight spaces or high attics can be hazardous—leave it to the experts.
Time constraints: If you’re juggling a busy schedule, hiring a professional can save you time and hassle.
Ultimately, assessing the project’s complexity is key.
Professionals bring expertise and the right tools and equipment, ensuring the job is done correctly.
They can evaluate your home’s insulation needs, recommend appropriate materials, and install it efficiently.
This ensures you get the maximum benefits from your insulation investment.
Review
By choosing DIY blow-in insulation, you’re enhancing your home’s comfort, crafting a cozy sanctuary that breathes warmth in the winter and coolness in the summer. Picture a snug retreat where energy bills dwindle and your home’s value rises like the sun casting golden rays on a well-kept garden. With the right tools and a little effort, you can transform your space into an energy-efficient haven, making it a wise investment for both now and the future.
Recent Posts
Top 10 Attic Air Sealing Techniques for Insulation
Just as a tightly sealed ship avoids leaks and remains buoyant, your attic’s air sealing
What Are the Best Attic Air Sealing Techniques?
When it comes to attic air sealing, understanding the common leakage points is vital for
What Are the Best Energy-Efficient Insulation Upgrades?
Insulation upgrades play a crucial role in enhancing your home’s energy efficiency. You might be surprised